LED strips are perhaps the most fan-favorite application of LED lighting projects. They have many uses and can instantly take the mood of a room to new places with their flexibility, brightness output capabilities (depending on how they’re connected), and color temperature options like warm white or cool blue depths that range all across RGB displays–you name it!
Connecting LED strips together is a simple process that can be done using connectors, cables, or even just solder. The connection strength will depend on how much power each individual strip has outputting and what type of wiring method you decide to use for connecting them all together!
To connect multiple LED strip lights, you will need to use a power supply that can provide enough current for all of the strips. The power supply should be rated at least as high as the total wattage of all of the strips. You can connect the strips in series or in parallel, depending on how you want to configure them.
If you are connecting the strips in series, then each strip will be connected in series with the next one. The positive and negative terminals of each strip will be connected together, and the positive and negative terminals of the power supply will be connected to the same terminals on each strip. This will create a single circuit with all of the strips in it.
If you are connecting the strips in parallel, then each strip will be connected in parallel with the next one. The positive and negative terminals of each strip will be connected together, and the positive and negative terminals of the power supply will be connected to opposite terminals on each strip. This will create two separate circuits, each with its own set of strips.
Can Multiple flexible LED Strips Lights Be Connected Together?
When connecting two LED strip lights, it is easy to do so considering they come in reels with dotted lines for cutting the desired length.
You can join LED strips using either connectors or soldering the copper pads on each individual light.
The strip has small circuit connection dots that need to be connected with leads, after removing any protective plastic covering from them so they are ready for connection when you’re done!
Connecting different brands of LED light strips is possible if they have the same voltage.
When connecting light strips with different voltage requirements, make sure that you are using the correct wire for each piece of equipment.
If they do not match up properly or have incorrect polarity markings on them then it can result in damage to both items – a waste!
Connecting different brands of LED strips can lead to problems like one wearing out faster or dimming.
It is best practice for this reason that you should always connect your lights from the same manufacturer even if they are more expensive than another competing brand – especially when it comes down to safety concerns!
To ensure safety, it is important to buy certified products.
Cheap LED strips can create a fire hazard when connected together because they use thin material which doesn’t withstand high currents or heat up very quickly.
Although the benefits of using LED strips are endless, there is still some risk involved.
Since they can be mounted on wood or plastic surfaces and create a heat hazard with fire potential- consider your options before connecting them!
Connecting different types of led strips can be quite a challenge.
For example, an RGB strip uses 3 times more power than white LEDs and they cannot run on the same voltage source as well because there are three ratings for each type: 12 volts/24V or 5 V DC (VDC).
That makes it important to ensure you have enough juice in your PSU if trying to connect these together!
In order to power your LED strips safely, it is important that you think about the most cost-effective way first.
One smart approach would be placing a supply on one corner of each room’s ceiling and then connecting two parallel LED light strings from this point forward.
In order not only to save money but also to prevent voltage drop where lights towards end are getting dimmer.
Because there’s a lower amount reaching their ends with greater distances traveled through circuits before being distributed again throughout an entire building.
Also read: Ultimate Guide on Buying LED Strip Lights
How To Connect LED Light Strips Using Connectors
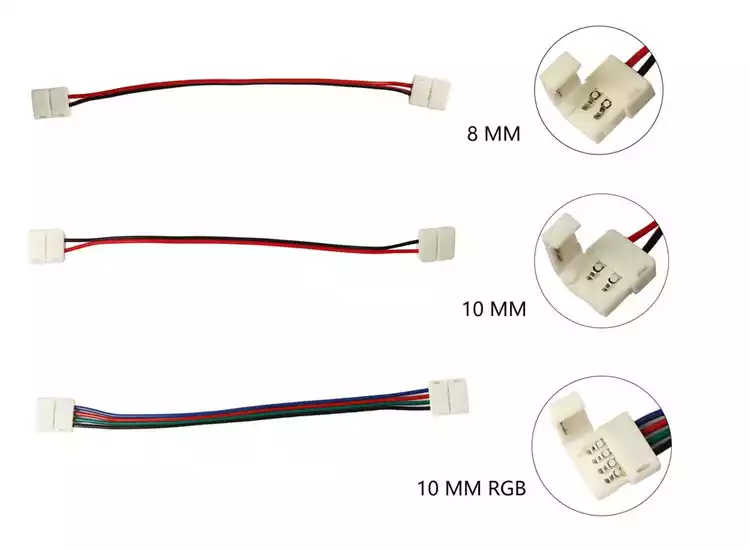
We will discuss several types of connectors that you might need to use depending on your specific needs.
- A simple connector clip with pins
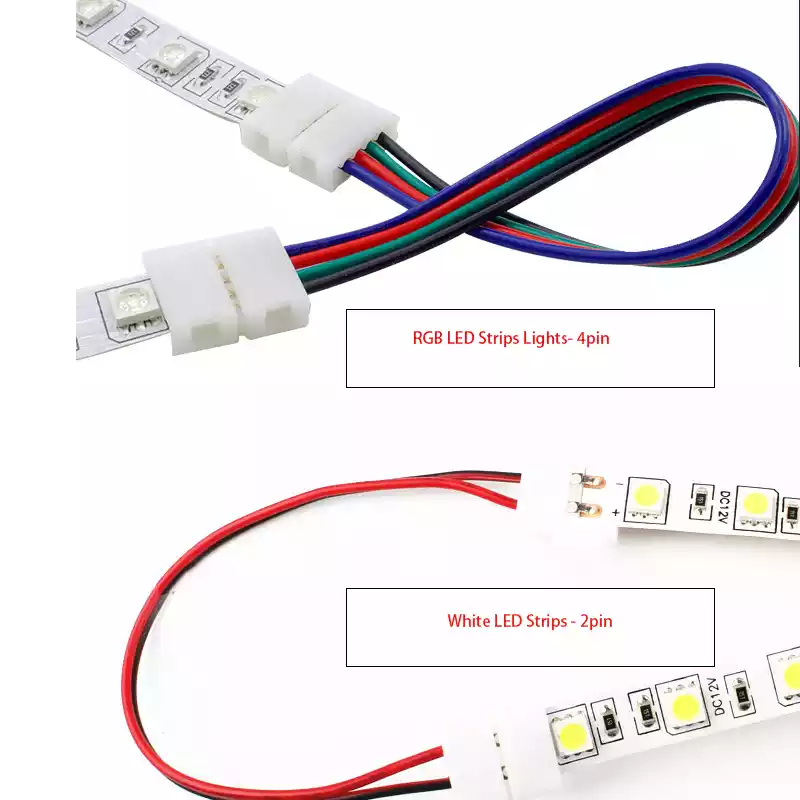
The copper pins on this connector make it easy to connect LED strips without connecting individual LEDs.
Simply press the two pieces together until they click shut, then position them wherever you need lighting !
- The Second connector is two clip pins on the middle with a cable
This is used for extending your LED strips around corners or angles, which will allow you more flexibility when it comes time to install them!
- The third connector is only one clip on the side end of the wire
You then connect this wire to the power supply unit (PSU) or another device with an opening for accepting LEDs and cables such as an RGB controller, so you have remote control over your installation!
FAQs About LED Strips Connector
1)Q. What is an LED Strip Connector?
A. An LED Strip Connector is a device used to join two or more lengths of the LED strip together.
2)Q. What are the benefits of using an LED Strip Connector?
A. By using an LED Strip Connector, you can save time and money by avoiding the need to cut and solder the strips together.
3)Q: How do I connect my LED strip to the connector?
A: The easiest way to connect your LED strip to the connector is by using our solderless connector system. To do this, first, strip the end of your LED strip and then insert it into the connector. Next, use a pair of pliers to crimp the connector shut.
4)Q: Can I use the LED Strip Connector to extend the length of my LED strip?
A. Yes, you can use the LED Strip Connector to extend the length of your LED strip by connecting two or more strips together.
5)Q: How do I know which connector to use?
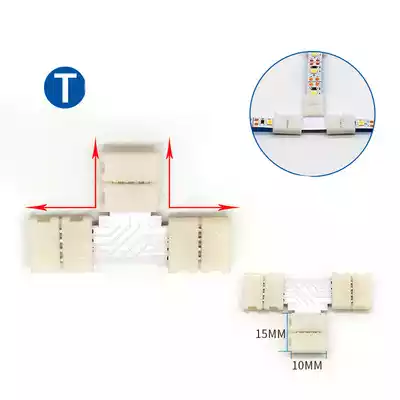
A.Straight connectors are best for short strips, while right-angle connectors are ideal for longer Strips. L-shaped connectors are perfect for corners and tight spaces. Choose the connector that best suits your needs.
Conclusion
So there you have it, three ways to connect your LED strips without having to solder every individual light. If you’re looking for an easy and convenient way to get your lighting project up and running, be sure to contact MSHLED for all of your connector needs! We can provide you with the best connectors on the market so that you can focus on what’s important – making your space look beautiful.


