
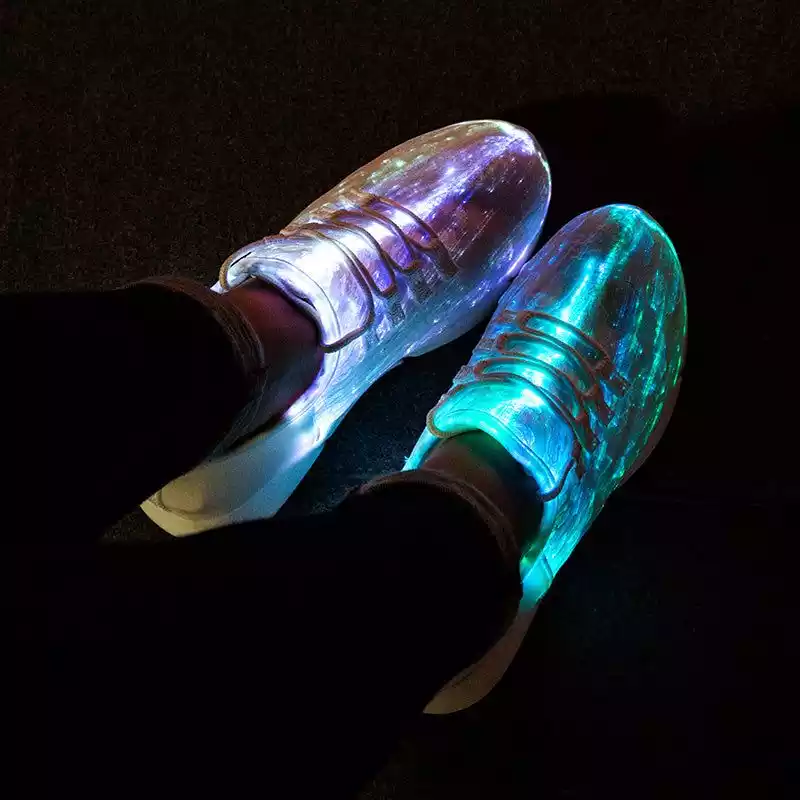
LED light strips are an excellent way to add lighting to your projects. They are flexible and easy to install, making them ideal for tight spaces. LED light strips also have a very small carbon footprint and don’t emit a lot of heat. This makes them more environmentally friendly than traditional sources of lighting. In addition, LED light strips are more energy-efficient than traditional lighting, so you’ll save money on your energy bill. You can easily connect multiple LED light strips together to fit your space.
The steps for installation of led strip lights are as follows:
1. Choose the location for your LEDs. You will need to Strip off about an inch of the plastic coating from the end of the LEDs. This exposes the metal contacts which must be soldered to connect the lights to a power supply.
2. Prepare your power supply. You will need to solder wires to the positive and negative leads of your power supply. Make sure that the wire is long enough to reach from the power supply to the location of your LEDs.
3. Solder the wires from the power supply to the exposed metal contacts on the LEDs. Make sure that you connect the positive wire to the positive contact and the negative wire to the negative contact. If you are unsure which is which, consult a diagram or seek assistance from someone with experience in electronics.
4. Once everything is soldered together, you can test your work by plugging in the power supply and flipping the switch. The LEDs should light up if everything is connected properly. If they do not, check your connections and make sure that there is no loose wire or bare metal touching anywhere it shouldn’t be.
5. You can now attach your LEDs to whatever surface you desire using double-sided tape or another adhesive material. Be creative in your placement-LEDs can accentuate just about any space!
1. Check your Lights Before Cutting or Installing the LEDs

You can reach out to a reliable LED strip manufacturer and mention your specifications. The manufacturer will then provide you with the brightest LED on the market. Once you receive the LED, it is crucial to test it before setting it under your counters, cabinets, or inside coves. Before you cut any of the lights or attach them to any surface, make sure you follow the steps below:
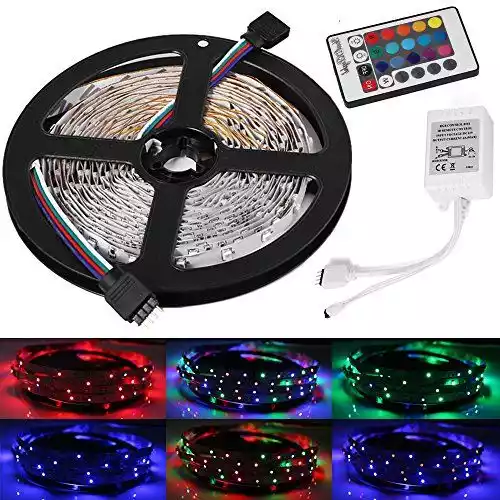
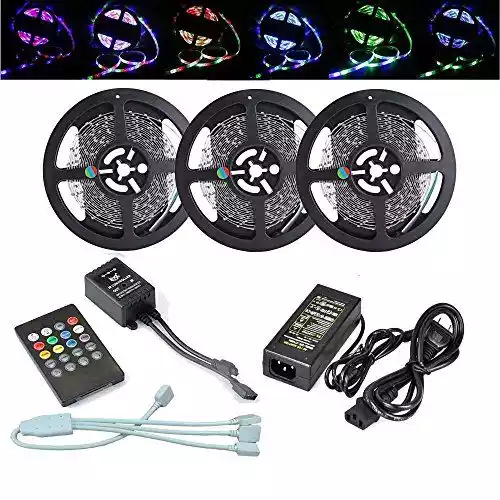
- To set up a mock installation, you will need the following components:
-LED strip lights
-Power supply
-Scissors
-Double-sided tape or 3M mounting strips
- Remove the LED strip lights from the plastic reel and unroll them. Cut the strip lights to size using scissors. If you are using double-sided tape, attach it to the back of the LED strip light now. If you are using 3M mounting strips.
- Connect the lights that haven’t been cut to the power supply and turn it on. The strips should be illuminated now. Please double-check your connections if they don’t.
- Take a note if the lights are bright enough or if you need a dimmer. Check if the LED light colors are perfect for your application.
- Once you have your LED strip, test it out before installation. This can be done by connecting it to a power supply and then using a multimeter to measure the voltage and current.
To get an accurate measurement, we recommend cutting a small piece of the LED strip (2-3 inches) and then testing it. If everything is working correctly, you should see a reading of 12 volts and 500mA on the multimeter.
If the voltage or current is too high or low, you may need to adjust the resistor on the strip. For more information on how to do this, please consult the manufacturer’s documentation or contact them directly.
Once you have verified that the LED strip is working correctly, you can proceed with installing it. Be sure to follow all of the necessary safety precautions when doing so.
2. Cut the LED strip light to the desired length with a pair of scissors or a utility knife.
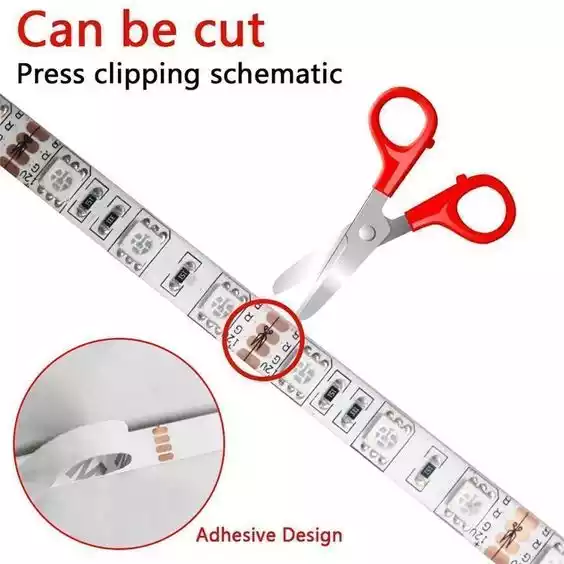
Before beginning any LED strip installation, it is essential to take precise measurements in order to establish how many feet of strips will be required. The next step is to use sharp scissors to cut the strips to the required length. It is important to note that LED strips can only be cut along the regularly spaced, clearly indicated lines. For example, on the LED 5050 strip, the cut lines are placed at every three diodes all the way down the strip. With these preparations complete, the actual installation process is relatively short and straightforward.
Notes of cut the LED Strip Light:
1) Measure the area where the LED strip light will be installed and cut the strip light to the desired length with a pair of scissors or a utility knife.
2) If needed, remove the adhesive backing on the strip light.
3) Carefully position the LED strip light in place and press down firmly to attach it to the surface.
3. Prepare the Light Strip-To-Power Connection
Please refer to the diagram for the following steps:
1)Strip off an inch of wire
2)insulation from the wires coming from the end of the LED strip and the low voltage extension after the low voltage wire has been cut to length.
3)Wrap the exposed wires of the positive and negative lines together and secure the connection with wire nuts.
4)Now, twist together all three of the black wires coming from the power supply, dimmer, and LED strip light.
5)Secure this connection with a wire nut.
6)Finally, twist together all three of the red wires coming from the power supply, dimmer, and LED strip light.
7)Secure this connection with a wire nut.
4. Connect Two LED Light Strips With a Strip Connector
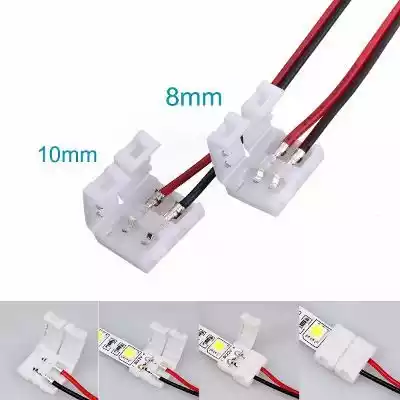
1. Strip the insulation from the end of the first run of LED strip light and twist the exposed wires together.
2. Strip the insulation from the end of the second run of LED strip light and twist the exposed wires together.
3. Tin the stripped wire ends with a soldering iron.
4. Twist the solderless connector onto the twisted wire ends.
5. Solder the strip connector to the LED strip light, if desired.
5. Combine the LED Strips Light

Connect the positive (+) lead from one strip to the negative (-) lead from the next strip, and keep going until all of the strips are connected.
You can do this by soldering the leads together or by using a connector. Once the leads are connected, you will need to tape or heat shrink the connection to prevent shorts.
Finally, you can connect the power supply to the strips and test the connection. If everything is working properly, you should see a continuous line of light. If there are any gaps in the light, you may need to adjust the connection or add additional strips.
Steps for combining Digital Addressable LED Light Strips as below”
1. Cut the digital addressable LED strip at a predetermined line.
2. Peel back the cover in the same way you did in step 4 to attach the strip connector.
3. Then, using the “no wire” connection, clip the two lengths of strips together, while ensuring a strong point of contact between the strips.
4. Make sure that the positive and negative sides are oriented correctly.
Now, connect the power supply to the LED Strip. The positive (+) lead should be connected to the Anode (longer lead) of the first strip, and the negative (-) lead should be connected to the Cathode (shorter lead) of the last strip.
6. Test The LED Strip Lights

It is always best to test your LED strip lights before you install them. This way, you can make sure that they are working properly and that there are no issues with them. To test your LED strip lights, simply connect them to a power source and then turn them on. You should see a consistent, bright light. If the light is dim or flickering, there may be an issue with the bulbs or the power supply. If everything looks good, then you can proceed with installing your LED strip lights.
7. Install The Dimmer
1. Remove the adhesive backing from the 3M hanging strips and attach them to the wall where you want to mount the dimmer.
2. Plug in the power supply to the dimmer by running the wires into the bottom housing on the right side labeled “In” (the black wire goes in the negative (-) slot and the red wire goes in the positive (+) slot).
3. Secure the connection using a flathead screwdriver.
4. Then, using a screwdriver to hold the wires into place, connect the wire to the area of the housing labeled “Out.”
8. Turn The Strip Lights On!

Assuming you have already connected the LED strip to the transformer, all you need to do now is plug in the transformer and turn on the lights. You can then adjust the dimmer to the desired brightness level. Enjoy your new LED lighting!
Conclusion
Conclusion paragraph: Installing LED strip lights is a great way to improve the look and feel of your home. Not only are they stylish, but they can also be used to make your home more energy efficient. If you’re interested in installing LED strip lights in your home, please contact MSHLED today for a free consultation. We would be happy to help you get started on this exciting project!

